January – March 2005/ Updated January – June 2015
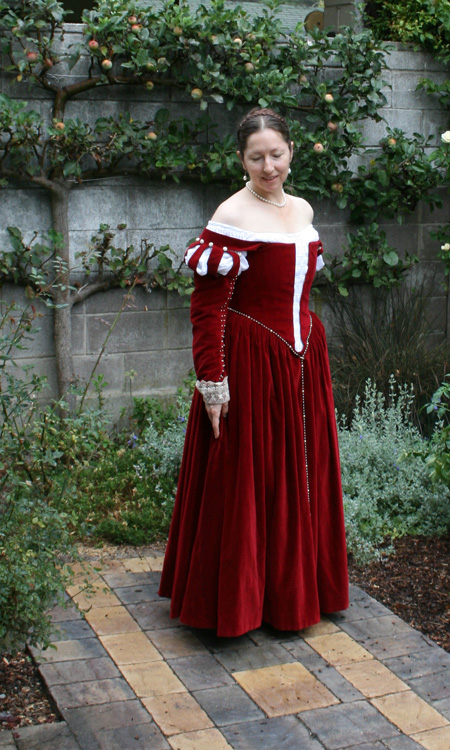
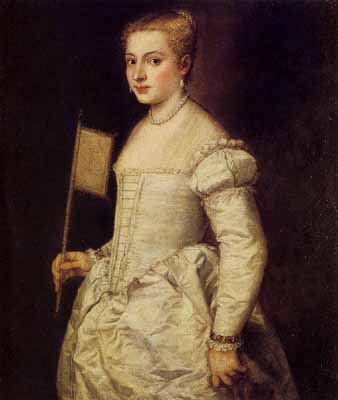
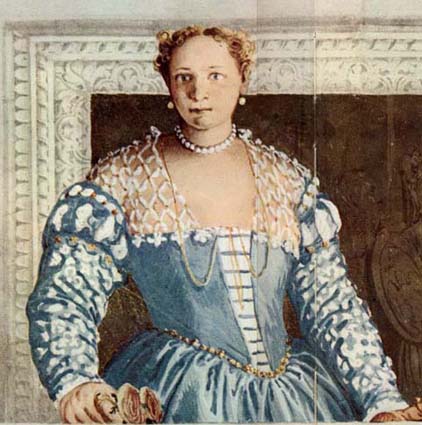
I decided to make an Italian 1550s gown as my first “real” Renaissance costume. Many hours were spent browsing the vast galleries and research notes at the former website The Realm of Venus, and I finally picked Titian’s “Portrait of a Lady in White” for the design inspiration. Not only are these outfits very elegant, but I knew that if I got the bodice all wrong, the front-lacing style would allow some room for error! This project involved a lot of time and frustration. It was my first attempt at working without a commercial pattern so there was a huge learning curve. Needless to say, I sewed the entire self-corseted bodice twice before I was moderately happy with the results. Most of the elements of this project came from information I gleaned on-line. If you do enough costume web-surfing you’ll probably recognize them. I wasn’t going for complete originality here: the real point was just to figure out how to make the darn thing! Despite all of the above, I would recommend anyone looking for a good beginner project, to choose a Venetian. There’s just so much great documentation out there on these styles.
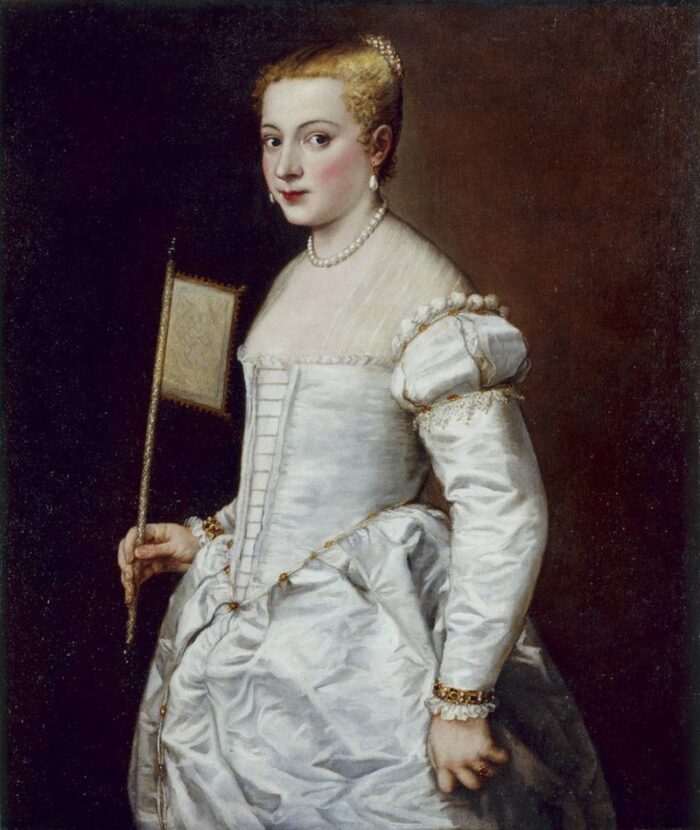
Gemäldegalerie Alte Meister, Dresden
The Process: It started off pretty smoothly. First I made a corset, and then I made a camicia. But then there was a hitch: I discovered that my corset, which I was going to wear as the bottom layer, showed through the very light-weight linen of the camicia. Not only that, but I was concerned that my corset’s shoulder straps were going to show: I hadn’t taken into account that these bodices are cut off-the-shoulder. So I actually started on a second corset (strapless), this time in white. It was midway through this second corset, that I decided it would probably be a whole lot easier, and more comfortable, to just bone the bodice instead. I didn’t know how to do this yet, but at least having made that decision, I was able to move on from the corset making. Though I came to this decision through trial and error, in retrospect, am glad I ditched the corset. I was also happy with the resulting silhouette.
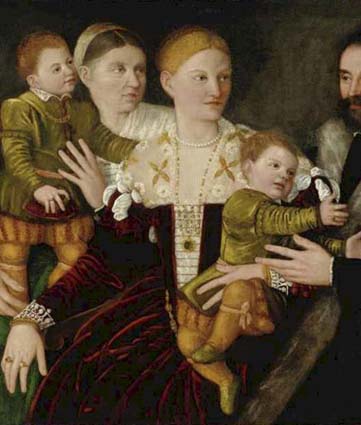
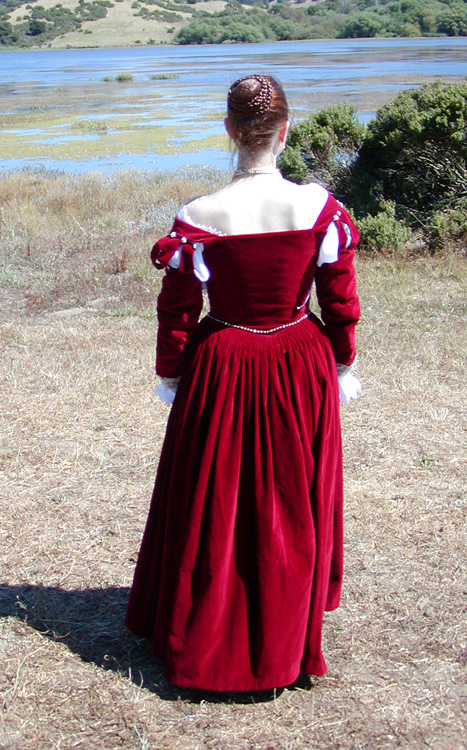
Luckily, the first corset didn’t go to waste, as I used it to get the measurements for my bodice. The bodice pattern is the famous Eleanora’s from Janet Arnold’s Patterns of Fashion, and I copied “A Lady in White” for the “v” proportions and front opening. The back was modeled after a Fasolo fresco. I tried both draping and pattern drafting, to get a good working pattern, and somehow managed one after five tries. It was around the third try that I abandoned hope of incorporating the shoulder straps, so they were pieced on later. I also added a “v” to the back bodice. With the addition of the skirt however, the v shape seemed to round out, so it doesn’t quite have the pointyness I was going for.
Vicenza, Villa Caldogno
Treviso, Villa Barbaro
Venice, Republic of Venice
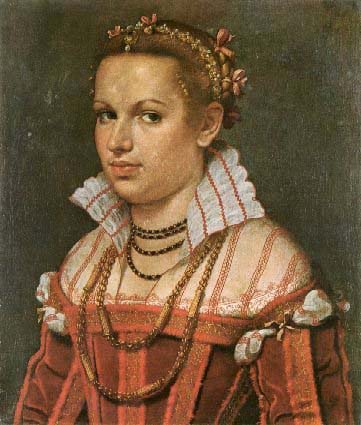
Isotta Brembati Grumelli
Location Unknown
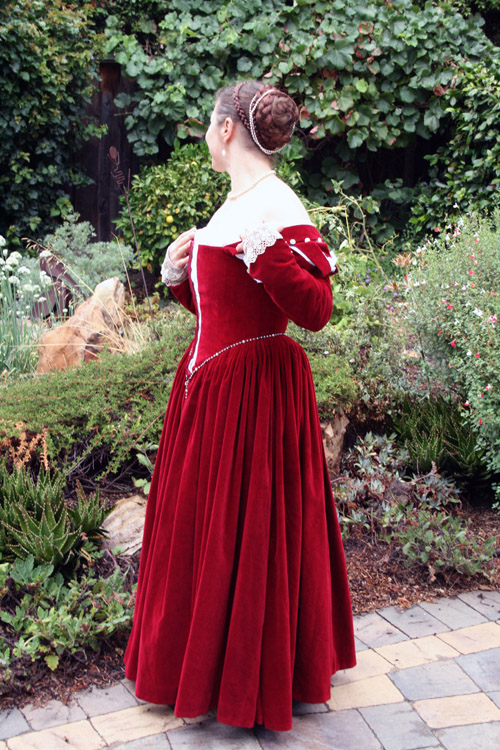
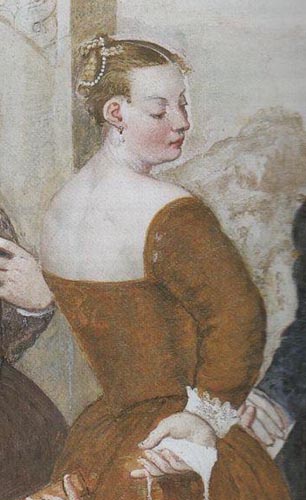
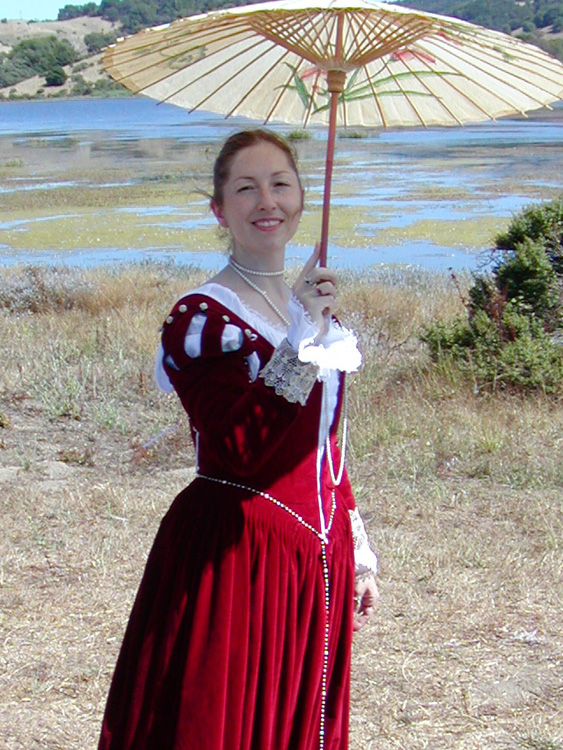
I placed the straps according to the “Lady in White,” very far out, so that they teeter on the edge of my shoulder. With the weight of the sleeves, they occasionally slip off. However there is no danger of losing the dress because the self-corseted bodice holds everything up. Many months after completing the dress, I discovered the Moroni above at Realm of Venus. So I feel pretty good about my strap-placement and strap-slippage. There are quite a few other examples that show a similar cut.
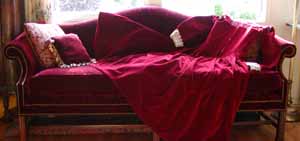
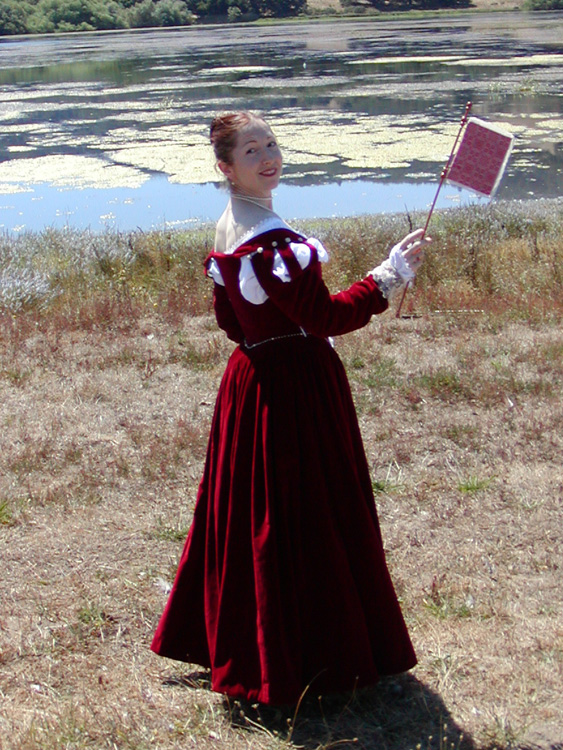
For fabric, I was determined to use something red (apparently the favorite color of the Venetians). But I was also determined not to spend a lot on silk, as I wasn’t 100% sure that this costume was going to work. A patterned fabric was also out — just an additional complication. So I bought red cotton velvet at JoAnn’s with a coupon, dyed it, and held my breath. I was hoping for deep red but it came out wine. This is one of my favorite colors, but one I am currently trying to avoid. Here’s the dress, camouflaged against my velvet wine sofa and matching wine throw pillows. I upholstered* these myself several years ago, along with a wine-colored ottoman to match.
The skirt is POF‘s #48. After a lot of math, I came up with a waist measurement of 145″. I think this puts my 33″ bodice width to a 1:4.4 ratio with the skirt, which is about the same as the original pattern’s ratio. There was more than enough fabric at the waist, and in fact, I really had to cram those little pleats in to fit them all. In retrospect, the original pattern does not have the point on the back of the bodice, though I don’t know how this would have affected my calculations. At any rate, I used the skirt hem width from the pattern, as I was short on fabric, and it’s plenty full enough. The cartridge pleating went very well, and I hemmed the skirt by hand, adding a strip of wool just inside the hem for weight.
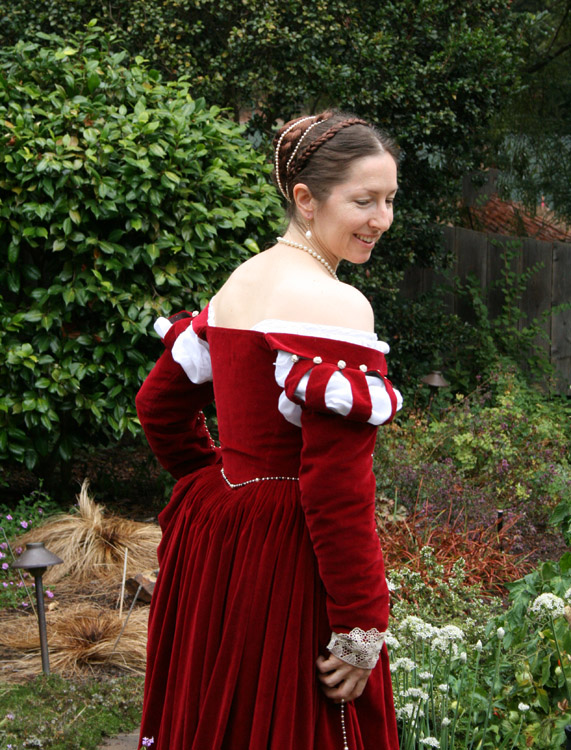
I drafted the sleeves, and lined them in green and wine changeable dupioni. (A petticoat would have been perfect out of this fabric, but I cheaped-out at the last minute). The lace for the “cuffs” was a find at the antiques fair for $3. And the sleeve embellishment was a happy accident. My sleeves were too tight so I let them out. Since the velvet had worn along the original seam line, I added two rows of gold colored pearls to disguise the damage.
The buttons are vintage: they’re covered in cream-colored, silk thread which matches the lace perfectly. One button is sewn in between each of the sleeve panes, binding them together.
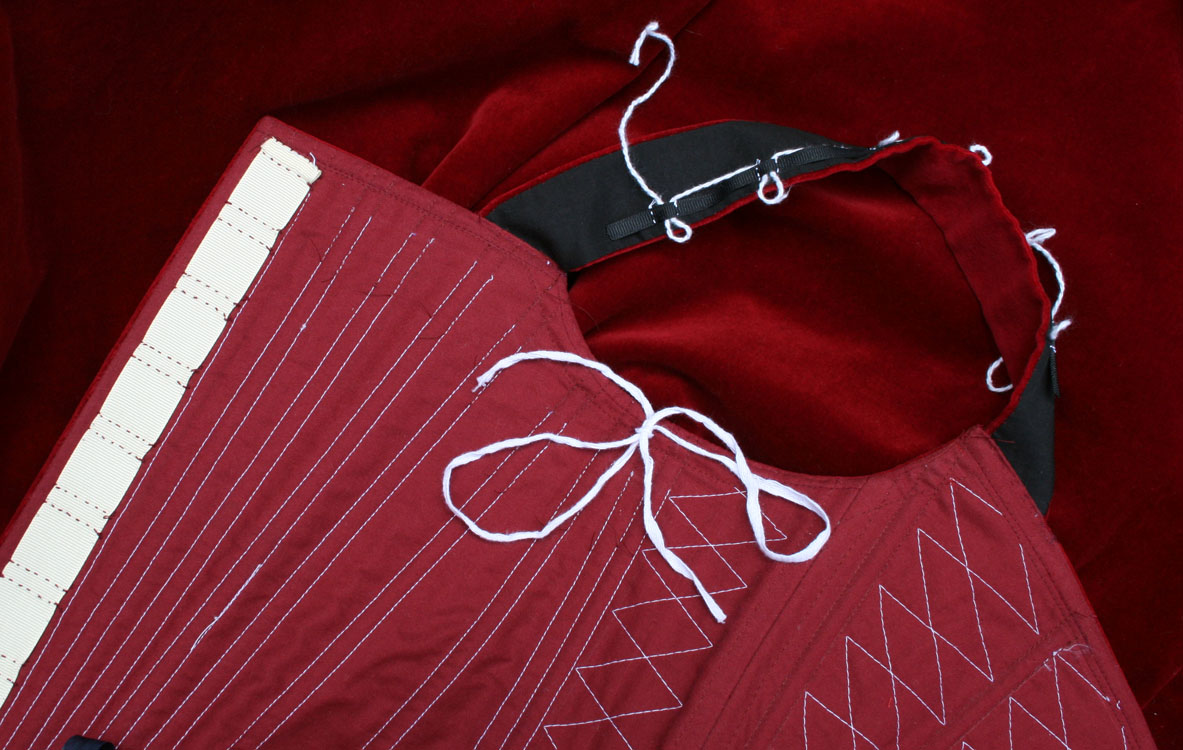
To attach the sleeves to the straps of the gown I tried loops on one side, and buttons on the other, without success. I just couldn’t get a tight fit of sleeve to bodice. I tried a few other things, and considered just sewing them on, when finally I had a brainstorm. I used Jen Thompson’s ladder-lacing method (which I naturally used at center front), but on the bodice’s shoulder straps. I sewed a narrow grosgrain ribbon to the inside of the straps, and laced the buttons on. It worked great, and now the sleeves are completely removable. Above is the right shoulder strap. You might also notice a tie sewn to the bottom of the armscye. This attaches to a single loop on the sleeve. It keeps the sleeve from sliding down my arm. Once the sleeves are tied on, the chemise is pulled through the sleeve poofs. The chemise becomes anchored in place by it’s own weight. (No pins needed, much to my surprise). The upshot of all of this is the chemise no longer peeks out at the wrists, as seen in the 2005 photos.
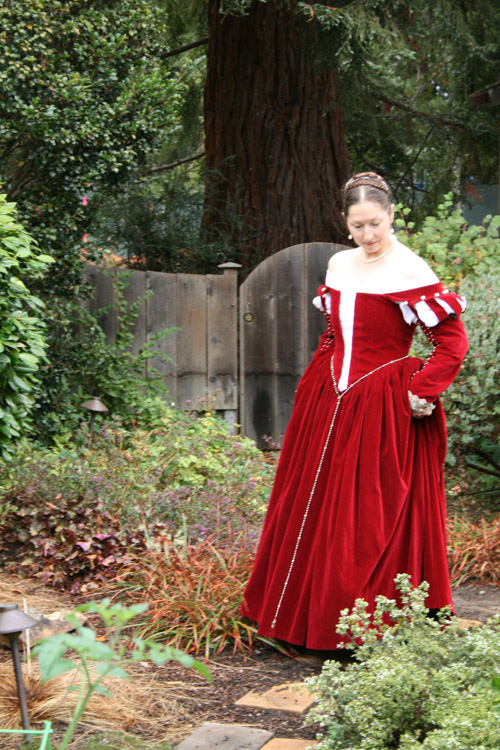
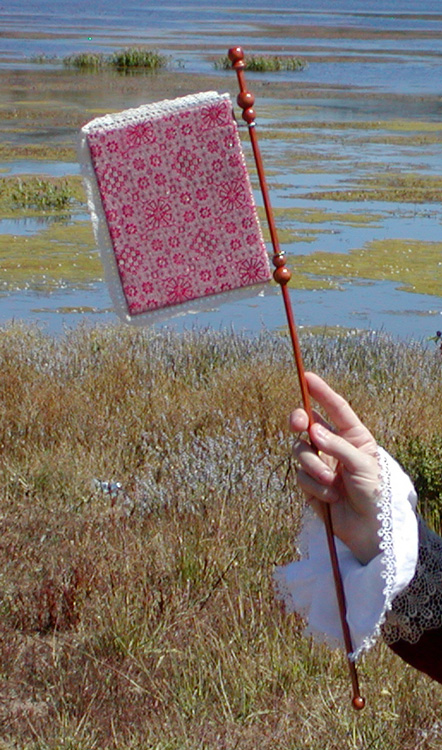
The girdle was my real splurge. It’s made of garnets, gold colored pearls, and fake cream-colored larger pearls, with a fancy clasp. The bauble on the end is the Tibetan symbol, for “strength,” I believe. I already had the rings and the long strand of pearls. And I love my fan! It’s pink silk brocade, (salvaged from an old pillow case) with a remnant of vintage lace. Fan-making instructions, along with so much more, can be found at The Renaissance Tailor.
* Upholstery: another great hobby, and as addictive as sewing.
Original Dress
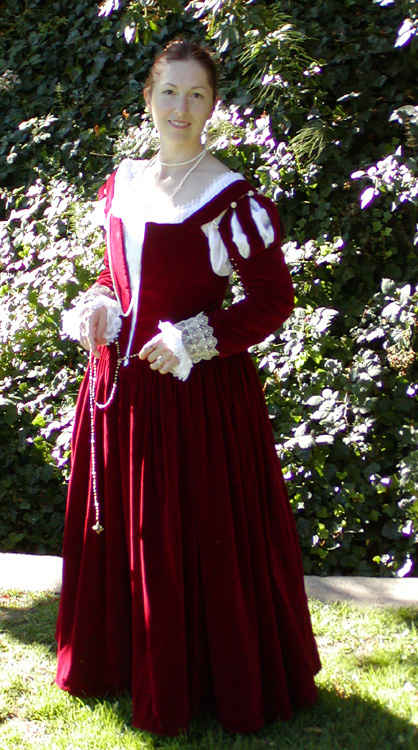
2015 Update
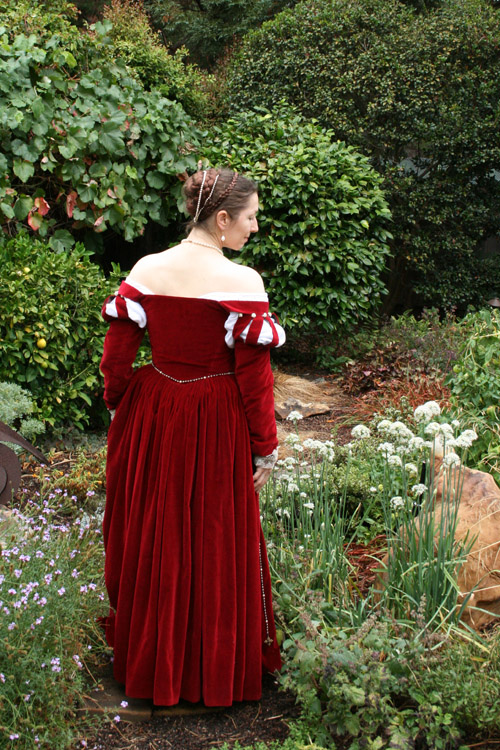
I still love this gown, but it had fallen out of rotation. To wear it again there was just one thing I had to fix – the bulk at the neckline. Especially the front corners where the ten-years-ago sewing really couldn’t be ignored. Since this meant taking the whole thing apart, I made a few other changes as well. The front and back necklines were lowered slightly. (Extra-wide seam allowances had been left in the shoulder straps, making this possible). The front and side bodice seams were taken in, leaving more of a gap at center front. Most of the bodice boning was replaced with cable ties. I left spring steel at the center front.
The skirt was reattached with more reasonably-sized 5/8″ cartridge pleats (1/4″ bigger than the originals). It was also rehemmed, to replace that strip of bulky wool with a simple bias facing. Finally, I decided to fully embrace an off-the-shoulder look. The straps fall there naturally once the sleeves are added. Since they aren’t drafted to sit in this position there is some buckling, but I can’t do any experimenting with the cut – there’s no more fabric!
All of these updates refined the fit and finish of the gown such that I’m happy to wear it once again.
2020 Edit
There are many theories on how these Venetian dresses were constructed and worn. The truth may never be known. But 15 years after this project, I am still in camp “no stays under camicia.” For recently released info on the construction of 17thC smooth-covered stays, see Patterns of Fashion 5.
Updated Dress